How to back up a Synology NAS to dosya with Hyper Backup
Hyper Backup is Synology's own backup app. Point it at dosya as S3 storage and it uploads versioned, deduplicated and, if you choose, encrypted backups of your shared folders on a schedule. Setup takes about fifteen minutes.
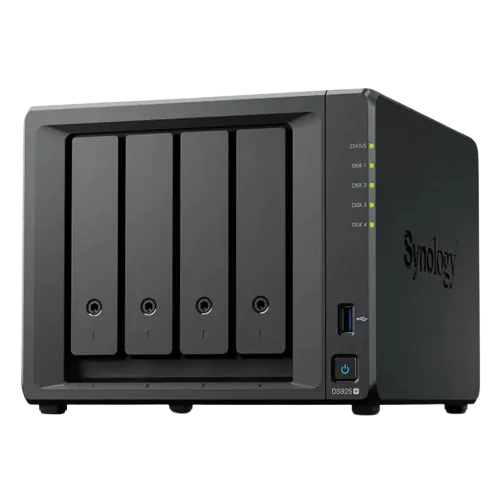
- App
- Hyper Backup on DSM 7
- Destination type
- S3 Storage, custom server
- Setup time
- About 15 minutes
- Restores
- Free on paid plans
Before you start
- A dosya account. Free includes 5 GB, enough to test the setup; pick a paid plan for the full backup.
- Hyper Backup installed from Package Center on DSM 7.
- The NAS clock synced: Control Panel > Regional Options > Time, synchronize with an NTP server. S3 sign-in fails if the clock is off by more than a few minutes.
- About 15 minutes, and a place outside the NAS (a password manager) for your keys and encryption password.
Set up the backup
- 1
Create S3 credentials in dosya
In the dosya web app, open Profile > API keys and create a key for the NAS. Limit it to S3 and to the workspace you will back up to, then turn on S3 credentials. Copy the access key ID and the secret key now; the secret is shown once. Your workspace ID, which is the bucket name, is on Integrations > S3.
A key just for this NAS means you can revoke it if the NAS is lost, without breaking anything else.
- 2
Start a new data backup task
Open Hyper Backup, click + in the upper left and choose Data backup task. Under cloud services, pick S3 Storage (not a named provider), click Next, then choose Create backup task.
- 3
Enter the dosya connection details
Fill in the S3 screen exactly like this. When the keys are in, click the bucket field: Hyper Backup loads the buckets your key can see.
- S3 Server
- Custom Server URL
- Server address
- s3.dosya.dev
- Signature version
- v4
- Request style
- Path Style Synology supports path-style buckets only with Custom Server URL and v4.
- Access key
- Access key ID from step 1 Starts with DOSYA
- Secret key
- Secret key from step 1
- Bucket name
- Your workspace ID Choose it from the list. Do not create a new bucket; dosya buckets are workspaces.
- Directory
- HyperBackup Any folder name. Hyper Backup stores the backup inside it as a .hbk folder.
- 4
Choose what to back up
Tick the shared folders you want offsite, then any apps whose settings you want kept. Start with the folders that matter most; you can add more later.
- 5
Set encryption, schedule and integrity checks
On Backup Settings, give the task a name and tick Enable client-side encryption. Set a password and keep the key file Hyper Backup downloads: you need one of them to restore. Turn on the schedule (nightly is typical) and Check index structure for the integrity check. Leave compression on.
Encryption and compression cannot be changed after the task is created, so decide now.
- 6
Turn on rotation
On Rotation Settings, tick Enable backup rotation and choose Smart Recycle: it keeps hourly versions for a day, daily versions for a month and weekly versions after that. Set the maximum number of versions to what your plan has room for.
- 7
Lower the upload part size before the first run
When the wizard asks whether to back up now, choose No. Open the task's settings and set Multipart Upload Part Size to 64 MB. Then click Back up now.
Hyper Backup's default part size is 512 MB. dosya accepts parts up to 100 MB, so a task left at the default fails on its first large file.
- 8
Test a restore
When the first run finishes, restore one folder to a new location (next section) and open a few files. Now you know the backup works before you need it.
Restore files
- 1
Restore single files
In Hyper Backup, select the task and click the magnifying glass for Backup Explorer. Pick a version on the timeline, select files or folders and choose Restore, Copy to or Download.
- 2
Restore whole folders
Click Restore > Data, pick the task and the version, then the folders to restore. Choose a new location the first time, so nothing on the NAS is overwritten.
Restore to a new NAS
- 1
Install Hyper Backup on the new NAS
Set up DSM, sync the clock and install Hyper Backup from Package Center. You do not need the old NAS.
- 2
Restore from the existing repository
Click Restore > Data and choose Restore from existing repositories. Pick S3 Storage and enter the same details as before: Custom Server URL, s3.dosya.dev, v4, Path Style, your keys and workspace ID. Select the backup's directory, then enter the encryption password or key file.
Lost the old key? Create a new S3 key in dosya; the backup does not depend on which key wrote it. The encryption password cannot be replaced.
- 3
Keep backing up from the new NAS
After the restore, create a task with Relink to existing task instead of Create backup task. Hyper Backup carries on adding versions to the same backup. Do not rename the backup directory in dosya, or relinking fails.
Questions
Is Hyper Backup incremental?
Yes. After the first run, Hyper Backup uploads only new or changed data and deduplicates at file level, so nightly runs are usually small. Each run is kept as a separate version you can restore from.
Does Hyper Backup encrypt my backup?
Transfers are always encrypted. Client-side encryption is optional and we recommend it: Hyper Backup encrypts the data with AES-256 before it leaves the NAS, using a password and key file only you hold. It cannot be switched off or have its password changed later, and without the password or key file nobody can restore the backup, including us.
Can I restore a Hyper Backup without a Synology NAS?
Partly. Synology's Hyper Backup Explorer for Windows, macOS and Ubuntu opens backup files on a local disk. Download the backup's .hbk folder from dosya first (for example with rclone), then open it in Hyper Backup Explorer. For a full restore, a Synology NAS with Hyper Backup is the supported route.
Hyper Backup or Cloud Sync: which should I use with dosya?
Use Hyper Backup for backups. It keeps many versions, can back up apps and settings, and encrypts on the NAS. Cloud Sync keeps a plain mirror of the current files, so a deletion or ransomware-encrypted file is copied to the cloud too.
How long will the first backup take?
Mostly as long as your upload speed allows. At 50 Mbps upload, 1 TB takes about two days; at 500 Mbps, about five hours. Later runs send only changes. Start with your most important shared folders and add the rest once the first run is done.
How much dosya storage do Hyper Backup versions use?
Roughly the size of your data after compression and deduplication, plus whatever changed between the versions you keep. When Hyper Backup rotates out an old version, the removed data sits in dosya's Trash for 30 days and counts toward your storage until it is emptied.
Why does Hyper Backup say authentication failed?
Check three things: the NAS clock (Control Panel > Regional Options > Time, sync with an NTP server), the access key and secret key (no spaces when pasted), and that Signature version is v4 with Path Style requests. A key limited to WebDAV or SFTP will also be refused over S3.
Can I use WebDAV instead of S3?
Yes. Choose WebDAV as the destination and use your workspace's WebDAV address, which starts with https://api.dosya.dev/webdav/. Your account email is the username and an API key is the password. We recommend S3 for large backups.
Does dosya support immutable Hyper Backup storage or Object Lock?
No. dosya keeps file versions and a 30-day Trash, but it does not offer S3 Object Lock, so leave any immutable or write-once option off.